
This is a step-by-step installation procedure for Linux, specifically RedHat Linux 4. This is only for beginners
who are doing this for the first time. I hope this will be useful. I am trying to explain the installation procedure of Linux on VMware.
1: open your VMware machine and select "New Virtual Machine".

2: Select "Typical (recommended) "and press "Next".

3: Click on "I will install the operation system later" You can select "Installer disc" if you have Operating systems boot able disk.
or you can select "Installer disc image file (iso)".
But we will first create a machine then install operating system.

4: Type your "Virtual Machine Name" and the location.
Note: change the location and select the Drive which has more empty space because your machine will create its hard disk on the same location and it will grow after.

5: For changing the location click on Brows Button and select the drive and Folder.

6: Type the disk space you want and click next.
You can add extra hard disk latter if you need.

7: click on finish

8: You have just created a machine you can say a CPU. You can see it on your VMware with your machine name. It will list all your Hardware’s like Memory, Processors, Hard disk etc.
You can change your hardware settings by clicking on it
eg: if you want to change your (Memory) RAM then click on it and change it.

9: Now its time to select OS DISK or iso file.
for this click on "CD/DVD"
Next window: select "Use Physical drive" if you have disk or Image of OS boot able.
if you have a image you have to mount it first with software like daemons tool or etc then
select a mounted drive
Click on "Use ISO image file" if you have an iso file of OS.
click on "Browse" and select the iso file.

10: After completing these steps its time to in install LINUX.
Click on "Power on this Virtual Machine" to start the installation.
Press enter

11: select skip and press enter.

12: select the language.

13: The next window is for Partitioning of your hard disk.
There are 2 options available in Linux
Automatically Partition: Linux will automatically partition your hard disk.
Manually partition with Disk Druid: In this option you can create desired partitions, extra mount points etc. I am doing it by Manual Partition.
Select "Manually partition with Disk Druid" and click Next.
Click Yes for all warnings and click Next.

14: You will see /dev/sda its your hard disk.

15: For creating mount points
Click on new
Mount Point: "/"
File system Type: ext3
Size (MB): 14000
Click ok

16: For "swap" space.
Click on new
file System Type: swap

17: Size (MB): 2048 (always double of RAM)

18: For extra mount points
Click on New
Mount Point: "/oradata" (or whatever you want to name it just start with "/" mine is oradata)
File system Type: ext3
Size (MB): 2048
If you have free disk space (/dev/sda) you can create more mount points.
Click next when you done.

19: Click next because we don’t have to change Boot Loader etc.

20: It’s time to configure the network device.
Select the device (eth0) click on edit
Uncheck "Configure using DHCP"
ip address : 192.168.0.5 (or whatever you want)
Netmask : 255.255.255.0
Click ok

21: In Hostname section
manually : (provide host name eg: test.com etc.)
Click next

22: Disable Firewall and SELinux.

23: Select Time-Zone and Click Next.

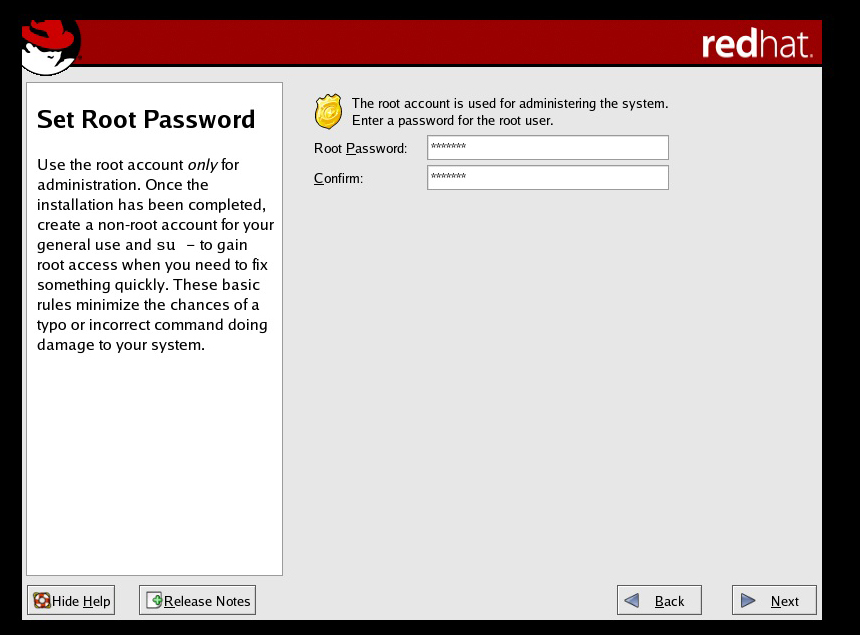
24: Provide the password for the root user and click next.
25: Next window is for Package selection. You have to Options
Install default software packages: Linux install mostly (not all) package automatically.
Customize software packages to be installed: you can select packages you want to install or you can simply select everything.
select: Customize software packages to be installed
Click next

26: select Everything click Next.


28: Congratulations, the installation is complete.
Click on Reboot.

Click Next

Click next.

31: You don’t need to create a user so click Next.
Click continue.

32: enter your username password
username: rootpassword: (password)

No comments:
Post a Comment
Ask your Questions....